Labels

Showing posts with label Lettering. Show all posts

Sunday, June 3, 2018

Our Invitation Suite!

Y'all... I have been drafting this project for years, practicing for just as long, and working to craft the details for several months now and I've finally done it... I sent out our invitations!!!


First came the design process, for which I've been prepping for years! Hours of consistent practice, countless drafts and ideas, and then the somewhat tedious task of actually crafting the final draft and knowing when to say "ENOUGH!" to my own perfectionism!

I have been tossing around sketches and drafts of our wedding crest / monogram for a while... playing with how to make it properly symmetrical, how to incorporate floral as well as architectural elements, researching and incorporating filigree (which I found out is a black hole of mathematical precision and symmetry that I only dipped my toes into!). I finally settled on something much simpler than what my original designs entailed: classic and official, something that I felt like could withstand the test of time and wedding design-trends.


Next, I got to lettering. I first covered the less daunting task of all of the detail text... knowing that all of my imperfections would be shrunk immensely and just getting used to the feeling of writing something with finality. Rather than knowing that I would have another few months and hundreds of hours of practice, I had to write it out, look back and assess, and rewrite anything that looked out of place or unsuitable for the final draft: learning how to finish.

I then tackled the larger components: our names and the titles of each card for the suite. I chose a spaciously-flourished script based on the script that I had used for the smaller text. I wanted something that felt formal but not too pretentious, aesthetically pleasing but not hyper-feminine, classic but also my own.


After I'd settled on a draft that I was pleased with, I moved on to the crest / monogram! I took the final concept that I had landed on and completely redid the entire thing: measuring the proportions with great precision and aiming to find a method of achieving effortless symmetry. I sketched in pencil, traced in pen, and then retraced once more with a few alterations, before scanning my design in and manipulating it digitally. I vectored the image, and then converted it back to a high-quality image file to put it to use!

With my final files completed, I gathered supplies for the design of my dreams!!

I finished up the final components of our suite: spacing everything out just so, creating a sketch of our venue as embellishment for one of the cards, and creating a clever multiple-choice option for our RSVP cards! After all of that, I sent my design off to the printer!

Upon receiving my prints with great joy, I got to slicing and scoring all of the cards...


And began the process of embossing our invitations. It was truly a handcrafted, small batch job... I might even be tempted to label it "artisan." I decided to emboss the major design components of the invitation itself in silver.


The crests were fairly easy to emboss...


...but the names proved much more challenging. There were so many components of the process that could so easily go wrong, I ended up crafting several that just wouldn't do to send out to guests.


In the end I got the job done and was so proud of the result!

ALL THE WHILE, as I was working on the invitations themselves, I was hard at work on addressing each envelope with great care. I decided to challenge myself with a flourishing script that was slightly askew on the envelope itself!
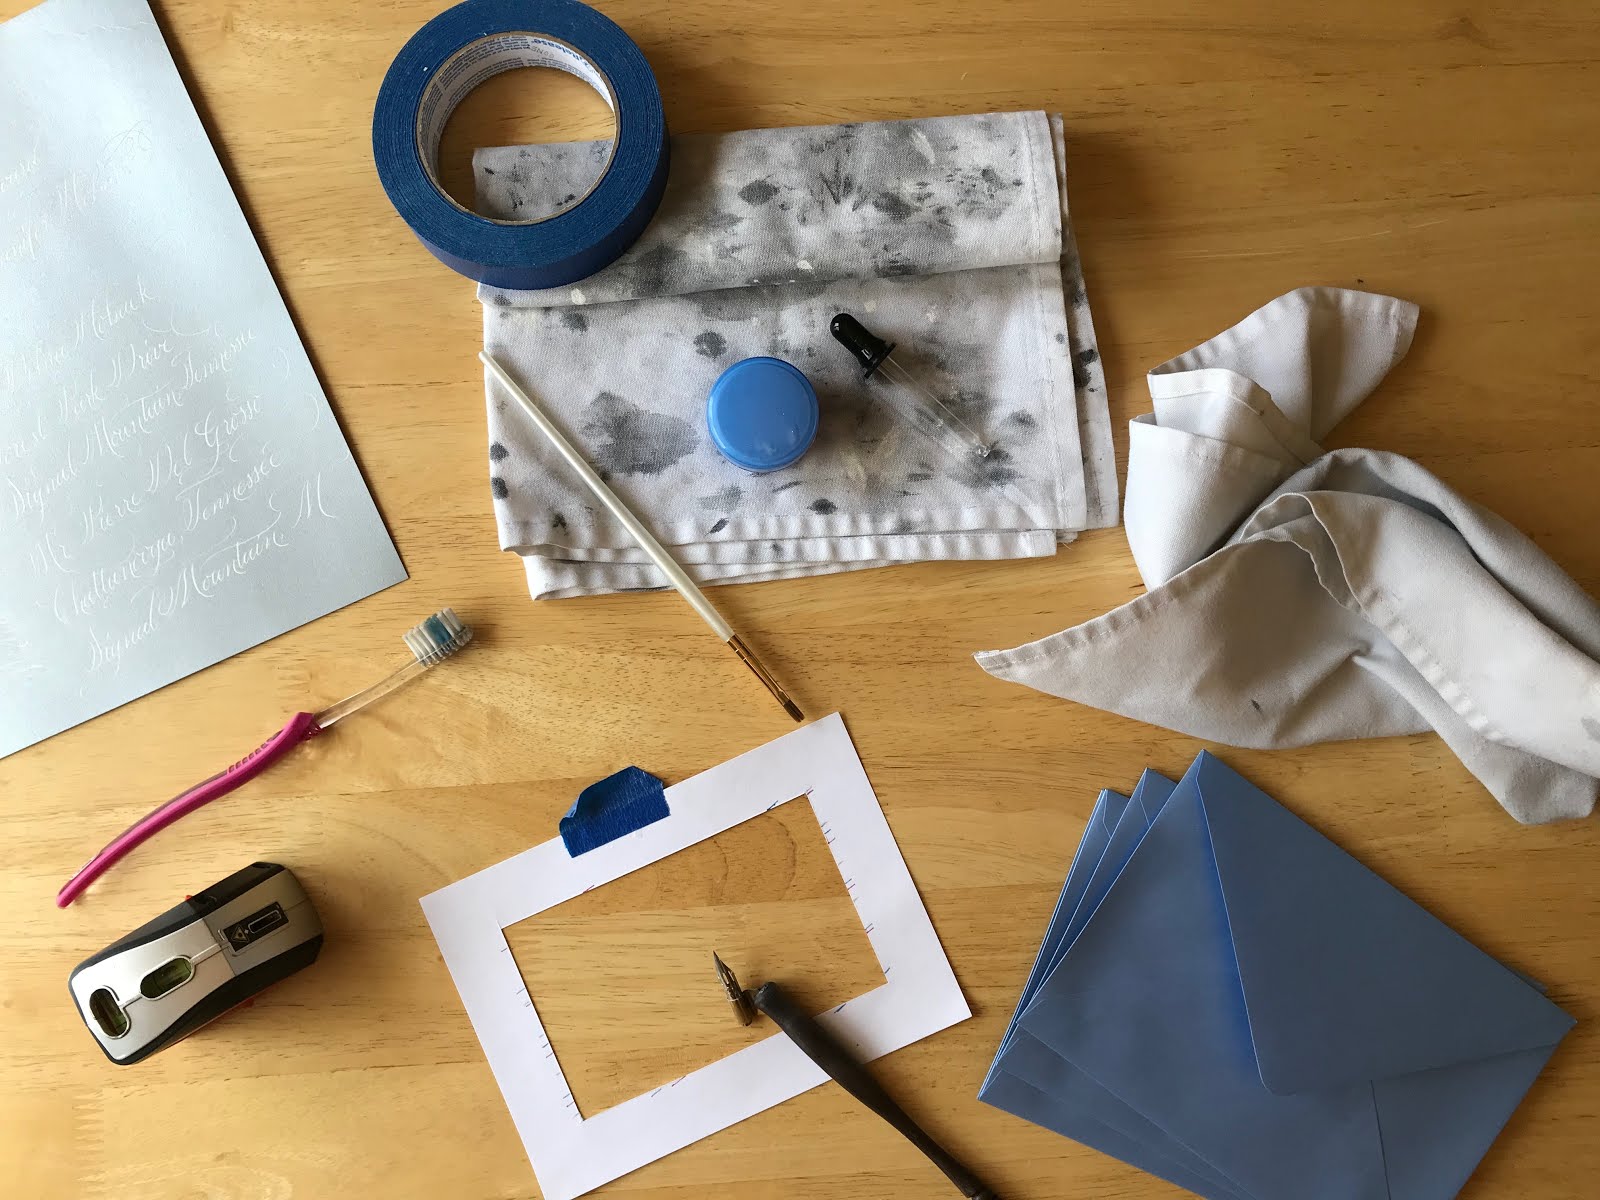

I have always LOVED the look of white ink on a light blue envelope, and since our wedding accent color is both slate blue and sky blue I decided to try to find something to match this theme. I found a beautiful metallic blue envelope that looks slate blue in shadow and sky blue in the light... perfect! The smooth finish made it really easy to create smooth, sweeping flourishes, which I could just STARE at for hours!!


Setting a schedule for myself to tackle at least two envelopes a day (they each took at least fifteen minutes to complete... did I say at least?), in my eagerness I ended up completing the task more than a week ahead of what I had planned! I think I was so daunted by the finality of the task initially, but once I fell into a rhythm working on the envelopes was really something I came to enjoy and look forward to.


From there, I used our trusty return address stamp (which I designed just before I sent out our save the dates) to mark each of the envelope flaps.


Then came stuffing the envelopes, sealing them, and adding the final, exciting embellishment: a custom-made wax seal! I used a version of our wedding crest / monogram to get this brass seal engraved and then purchased silver wax to add a bit of luxuriousness to the look of the envelopes as the icing on the cake!


I was so enthralled by how beautiful the seals were! The warm, melted wax oozing onto the envelope... the squish of the seal sinking into the wax... the pause in anticipation as I waited for the wax to cool... and then the gentle peel away, lifting the seal from the page and admiring the imprint with joy!


Ok now you can really tell that I'm a total stationary nerd!

I found some floral postage stamps and rushed to the post office. I hand cancelled each envelope so they wouldn't be damaged being run through a machine and walked away with a sense of accomplishment and glee.


I couldn't be happier with what I've come up with and can't wait to incorporate these special design details into our wedding day!! I've received with joy so many compliments on my hard work, and it really feels good to have tackled the whole task by myself. I've so enjoyed handcrafting every single one, and hope that each detail and consideration leaves each receiver feeling integral to our wedding day and to our life together. I hope these invitations serve as tangible souvenirs to happy memories made at our wedding this summer for years and years to come!

Monday, March 19, 2018

Crafting Our Vow Folios!

I’m so excited to share my most recent DIY wedding project. Our invitations and custom monogram have been in the works ALL this time, but a shorter-term project was crafting our vow folios!


I liked the idea of having several loose cards to help brainstorm and facilitate multiple vow drafts, so I looked up some crafting tutorials online. I found this collaboration tutorial between Shasta Bell Calligraphy and Esther Clark Co., and fell in love with the look and texture of these beautiful invitation folios!

Check out their gorgeous tutorial here! 

I got to work gathering supplies. I headed over to the craft store and found some white duck canvas, Elmer’s craft glue, and photo-matting board from the framing section of Jo-Ann’s. It felt a bit sturdier than the chipboard they had on hand.

Upon arriving home, I unpacked the plant-dyed silk ribbon that I got from The Poetry of Silk for my bridal bouquet. I thought this would be a nice touch for such a special wedding day prop!

Look at that beautiful ribbon! Click to view "The Poetry of Silk" website!

I got to measuring, cutting to size, and gluing and got the whole project finished in under two hours!

I’m so happy with how they turned out. They are very sturdy feeling and I love that the canvas has a nice texture to it. I feel very proud of my meticulous handiwork!


As I said earlier, the inspiration and instructions that I used for these folios is from a collaboration between Shasta Bell Calligraphy and Esther Clark Co.. Let me know if you make your own! Happy crafting!

Sunday, February 4, 2018

Latest in Lettering: Our Invitation Suite!

Invitation designs have begun! I have been looking forward to this aspect of wedding planning/designing for such a long time! I’ve been doing a lot of traveling lately but ALWAYS pack my calligraphy supplies so I can stay in practice as much as possible! I’ve been perusing different ideas for a long time now and have acquired some supplies to see if my dream DIY invitation suite is possible!

My taste hasn’t really changed since I was dreaming up ideas back in February 2017 with my post, “Wedding Stationary Inspiration.” Our wedding accent color is still blue, but I’ve broadened the palette to slate blue, French blue, AND sky blue! I love the range!

Click to view my wedding paper inspiration on Pinterest! 

I worked really hard on writing out all of the detail text, saving the larger, flourishing text for last. I was so excited when I arranged all of it together digitally: there’s a chance this may in fact look pretty professional after all (I really need to stop doubting myself)!


Next up is to start practicing with the ink that I’m going to use for the envelopes and finish designing some more aspects of our invitation suite! I’m so excited for it all and will be sure to fill you in as I go!

Saturday, January 20, 2018

Here’s to 2018!

I absolutely can’t pass up sharing my special New Year’s celebrations (even though, I realize, it is a little belated)!

First off, feeling especially domestic from the holidays and from a book that I recently bought (“All in Good Taste” from Kate Spade), I decided to spend some time reorganizing and sprucing up the house! With many new Christmas goodies, this was not a difficult task!

I tackled our bookshelf first. I displayed all of our wedding planning things, cookbooks, new recipe box, and some special serveware, both old and new!


I also made a cute little display in the bathroom with several gifts and cosmetic products arranged just so.


I won’t bore you with my other mini-projects, but all of this domestically-motivated inspiration was brought to a head when my future-maid-of-honor asked me to host a pre-NYE-party-party / birthday-get-together for her! I was thrilled and got straight to work!


Because of the short notice I decided to throw together a few simple snacks and sips. We had champagne, a hot cocoa bar, and stovetop popcorn! A little bit shabby chic (the new Kate Spade book surely inspired me!).
(popcorn aftermath) 
For me, party planning includes lettering, of course. I made sure to label all of the mugs for the hot cocoa station...


And “champagne glasses” (aka cute jars because I didn’t have nearly enough champagne glasses for the occasion)!


I made some festive signs and displays....
(the pearls are my favorite detail) 
...put out our most festive, black and gold decor...


...and set the mood with lots of candles!


I even made a little Hot Toddy gift package for the lady of the evening! It was fun to put together the instructions and gather all the supplies: a flask of bourbon, a lemon, a bunch of black and chai teas, a petite jar of honey, and some spicy garnishes (cinnamon stick, whole cloves, allspice berries, and candied ginger).


I wore my most garish gold sequined skirt (an old hand-me-down from a friend), lit all the candles, and got ready for the guests!


We ended up having a great time. It was just the right setting to spend time and laugh together! Our fish were very hospitable, and everyone seemed to have a good time before heading off to the more involved parties.

I was so happy to be able to host everyone! Afterwards I was feeling a bit under the weather, so I stayed home with Ben and we did our own private countdown at midnight. I got a little teary as we listened to a classical rendition of “Auld Lang Syne” and watched fireworks out the front door.

2018 is a big year for us. Many exciting things ahead and I’m so glad to have some great people by my side for it all!

Friday, January 19, 2018

A Christmas Post in Mid-January? Better Late than Never!

I’ve been out of town for a lot of January, so I figured I’d FINALLY make a Christmas post! Back to wedding planning soon... not to worry!


I really dived into making the house festive this year! I tried to use the things we have and make really minimal purchases to try to get the spirit of the season in our home!

First up, I styled our mantle. I found an old red and green ribbon that I twisted and curved around our regular items. I also bought some red and green fairly lights to make the whole thing a little more dreamy! I made sure our festive candles were on display and topped everything off with a few bows! We set the mood in our little living room by setting our accent lights to red and our fish lights to a festive green!


Speaking of bows... I went a little crazy with the bows! Each houseplant got a bow, plus jars, and even kitchen appliances!


I even put together a bow-embellished hot cocoa station for easy access on cold winter evenings! It was a delicious, cozy treat!


Also in the kitchen, we broke out some fancy Christmas towels and red and green oven mitts!


I put up all of the Christmas cards that we received this year on the fridge, and strung up a bunch of old ones above our kitchen table.


Something that was to special to lay out on the table was this festive table runner that my grandmother quilted by hand! Not wanting to risk ruining it with a single clumsy-moment spill, I hung it up and put it prominently on display in our living room.


One favorite detail I like to put out is the traditional fish-themed Christmas book that I made for Ben a few years ago: “‘Twas the Night Before Fishmas.” It’s exactly as cheesy as it sounds. I recently inherited this little precious moments angel that I put by this festive tin (full of ornament hooks) and eventually paired both with a scented wax melter that I got during a dirty Santa exchange!


Next, the Nutcracker station! I’ve had this little French nutcracker for a few years now and decided to get a bowl full of shelled walnuts, a tradition I’ve noticed several times at Ben’s family’s home. I’ve stationed both of these next to a dried bouquet that Ben got for me to celebrate our “one month since we said ‘I love you.’” Love keeping these little memories in my everyday space and consciousness!


I even got little stockings for our fishes! They are basically our kids.


We had recently lined our bedroom ceiling with lights, and decided to hang up some ornaments to make it feel especially Christmas-y!


And FINALLY, the tree! We found this cute little sprig and loved it at once!


We wrapped it in ribbon, some more fairly lights, and a couple special ornaments (the first of what’s bound to be an extensive collection). We topped it off with our ridiculous penguin friend, who never fails to make us laugh!


I put together a pretty bomb Christmas playlist (almost 100 tunes) and listened to it incessantly!


A special Christmas present was getting to spend some time with my dad during the holiday season! He came to Nashville for a weekend and we enjoyed catching up and spending some quality time together.

I made the extremely-dad-friendly sausage pinwheels that Ben’s dad always makes for us when we visit. Needless to say, my dad loved them.


We enjoyed going on a whiskey distillery tour together, went to The Frist Center for Visual Arts and saw the two exhibitions there, and had a very relaxed dinner at a local brewery and restaurant.

The next day, we trekked out to the beautiful Opryland Hotel and walked around for HOURS looking at the Christmas decorations, chatting, sipping, and eating. It was a great time, and I’ve never been able to make it out there during the holiday season, so it was really a treat! Overall we had a really wonderful weekend together, catching up, chatting about wedding plans, and watching some fun and hilarious movies together!


In preparation for the big day, I lettered and made a fun “To/From” stamp...


...and made sure to incorporate lettering every chance I could when gift wrapping.


After a long month of getting festive Ben and I were able to spend sometime at Ben’s family’s home for Christmas Day!


We had a great time relaxing together by the fire and spending time with loved ones. I received the traditional handmade stocking from Ben’s mother; if someone is officially joining the family they are gifted with this special tradition. I absolutely love mine, and was tricked into discovering it unexpectedly. Grateful to have this special memory recorded for years to come!


There were endless cookies and snacks and a really delicious array of menu items for our fancy Christmas Eve dinner! Ben and I accompanied his parents to the midnight candlelight service and got to see Ben’s mom perform a solo near the end! It was a very special evening.


Christmas Day was relaxed and joyful. Instead of busying myself with all of the cooking, setting up, and arranging that usually comes with Christmas time, I really took some time this year to rest, recuperate, and spend quality time with Ben and his family. I had a long Skype date with my family and got to talk to my grandparents over FaceTime as well! I continued my family’s tradition of watching “It’s a Wonderful Life,” as well.


Overall it was a really lovely holiday and I’m grateful for every special moment and memory!